Content Manager - Streaming Server
- Jennifer Kammien
- Eric Brown
The Content Manager allows you to easily manage all of the content in the Content Catalog. To get started, view this 4-minute tutorial or follow the steps below.
Overview
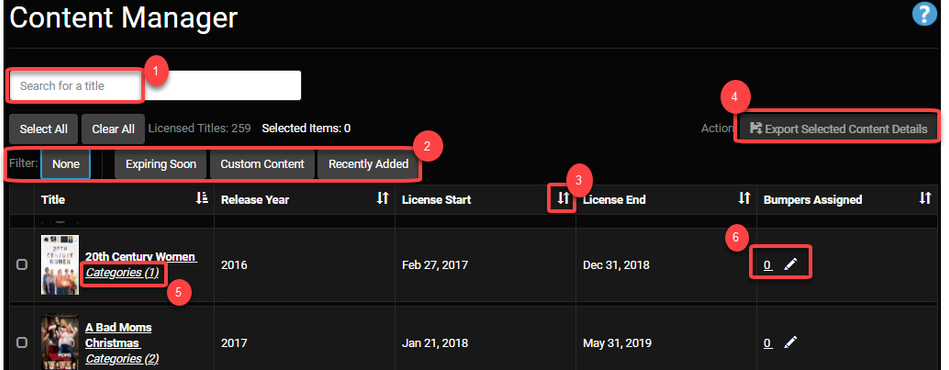
The Content Manager displays all of the titles in the Content Catalog, along with license information and links to view the content as well as manage categories and bumpers.
- Search for a title
- Filter content
- Sort the content by clicking any header
- Export details to a csv file
- Assign or edit categories for a title
- Assign or edit bumpers for a title
Searching & Filtering
1. To search for a single title, enter a title or partial title into the search field. Titles with your key words will be displayed.
2. To search for multiple titles, there are three filters:
- Expiring Soon - Titles expiring in 30 days
- Custom Content - Titles of the content you have uploaded to the Content Catalog
- Recently Added - Titles that were added to the Content Catalog in the past 30 days
3. To clear a filter, select None or click on the filter to deselect it.

Exporting Title Details
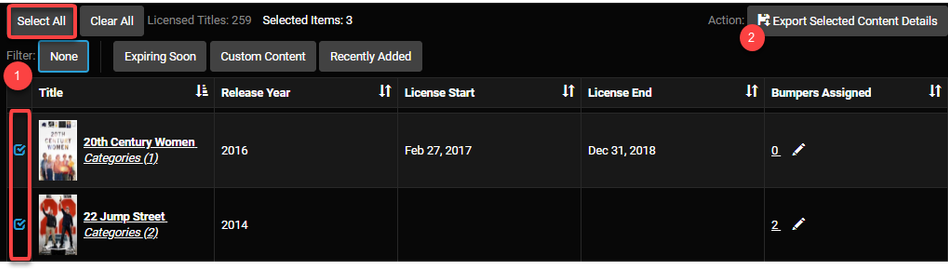
- In the Content Manager, click the Select all button. A check mark will appear next to every title. Or, select individual titles by clicking the field next to each poster.
- Click Export Selected Content Details. Access the csv file in your downloaded files.
Edit Content Categories
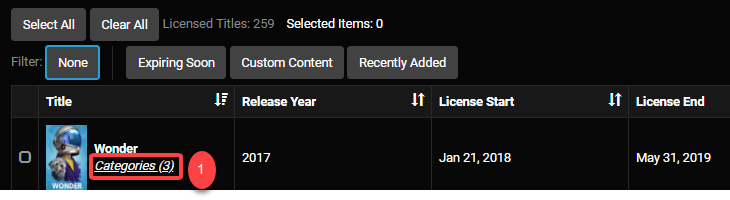
The Content Manager provides convenient links to update the category associated with titles. To update all of the titles for a category, please see the instructions under Category Manager.
1. In the Content Manager, click the Categories link under the title
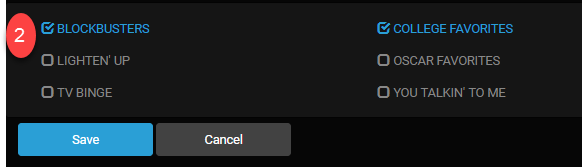
2. Check or uncheck the field next to the categories, then click the Save button. The title will appear under the newly assigned categories in the Content Catalog.
Edit Bumpers
The Content Manager provides convenient links to update bumper(s) assigned to titles. To update all of the titles for a bumper, please see the instructions under Bumper Admin.
1. In the Content Manager, click the number under Bumpers Assigned.

2. Under the Assigned column, select or deselect the bumpers by checking the field next to the bumper title.

3. Click the Save button at the bottom of the page, and the newly assigned bumpers will play when the title is selected in the Content Catalog.